harmony 鸿蒙HML
HML
HML is an HTML-like language that allows you to build pages based on components and events. Pages built using HML have advanced capabilities such as data binding, event binding, loop rendering, conditional rendering, and logic control.
HML Page Structure
<!-- xxx.hml -->
<div class="item-container">
  <text class="item-title">Image Show</text>
  <div class="item-content">
    <image src="/common/xxx.png" class="image"></image>
  </div>
</div>
Data Binding
<!-- xxx.hml -->
<div class="container" onclick="changeText">
  <text> {{content[1]}} </text>
</div>
/*xxx.css*/
.container{
    margin: 200px;
}
// xxx.js
export default {
  data: {
    content: ['Hello World!', 'Welcome to my world!']
  },
  changeText: function() {
    this.content.splice(1, 1, this.content[0]);
  }
}
NOTE - To make the array data modification take effect, use the splice method to change array items.
- ECMAScript 6 (ES6) syntax is not supported in HML.

Common Event Binding
Events are bound to components through ‘on’ or ’\@’. When a component triggers an event, the corresponding event processing function in the .js file is executed.
Events can be written in the following formats:
funcName: name of the event callback, which is implemented by defining the corresponding function in the .js file.
funcName(a,b): function parameters, such as a and b, which can be constants, or variables defined in data in the .js file. Do not add the prefix this. to variables.
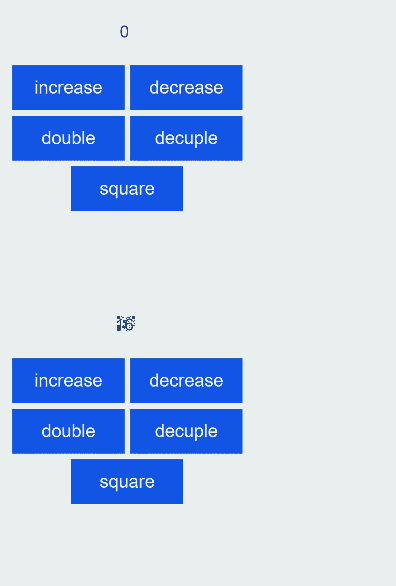
Example
<!-- xxx.hml -->
<div class="container">
  <text class="title">{{count}}</text>
  <div class="box">
      <input type="button" class="btn" value="increase" onclick="increase" />
      <input type="button" class="btn" value="decrease" @click="decrease" />
      <!-- Pass additional parameters. -->
      <input type="button" class="btn" value="double" @click="multiply(2)" />
      <input type="button" class="btn" value="decuple" @click="multiply(10)" />
      <input type="button" class="btn" value="square" @click="multiply(count)" />
  </div>
</div>
  // xxx.js
  export default {
    data: {
      count: 0
    },
    increase() {
      this.count++;
    },
    decrease() {
      this.count--;
    },
    multiply(multiplier) {
      this.count = multiplier * this.count;
    }
  };
  /* xxx.css */
  .container {
      display: flex;
      flex-direction: column;
      justify-content: center;
      align-items: center;
      left: 0px;
      top: 0px;
      width: 454px;
      height: 454px;
  }
  .title {
      font-size: 30px;
      text-align: center;
      width: 200px;
      height: 100px;
  }
  .box {
      width: 454px;
      height: 200px;
      justify-content: center;
      align-items: center;
      flex-wrap: wrap;
  }
  .btn {
      width: 200px;
      border-radius: 0;
      margin-top: 10px;
      margin-left: 10px;
  }

Binding for Event Bubbling5+
Binding for event bubbling covers the following:
Bind an event callback for event bubbling: on:{event}.bubble. on:{event} is equivalent to on:{event}.bubble.
Bind an event callback, but stop the event from bubbling upwards: grab:{event}.bubble. grab:{event} is equivalent to grab:{event}.bubble. > NOTE > > Event bubbling occurs when the target element and its ancestors have registered a listener for the same event. When the event happens on the element, it first runs the event handler on it, then on its parent, and then all the way up on other ancestors. If an element triggers this event, it first triggers the callback on the element, then on its parent, and then all the way up on other ancestors. > > For details about event bubbling, see Universal Events.
Example
<!-- xxx.hml -->
<div>
 <!-- Bind an event callback for event bubbling.5+ -->
  <div on:touchstart.bubble="touchstartfunc"></div>
  <div on:touchstart="touchstartfunc"></div>
  <!-- Bind an event callback, but stop the event from bubbling upwards.5+ -->
  <div grab:touchstart.bubble="touchstartfunc"></div>
  <div grab:touchstart="touchstartfunc"></div>
  <!-- Bind an event callback for event bubbling.6+ -->
  <div on:click.bubble="clickfunc"></div>
  <div on:click="clickfunc"></div>
  <!-- Bind an event callback, but stop the event from bubbling upwards.6+ -->
  <div grab:click.bubble="clickfunc"></div>
  <div grab:click="clickfunc"></div>
</div>
  // xxx.js
  export default {
      clickfunc: function(e) {
          console.log(e);
      },
      touchstartfuc: function(e) {
          console.log(e);
      },
  }
NOTE
Events bound using a traditional statement (such as onclick) will bubble only when the API version in use is 6 or later.
Binding for Event Capturing5+
Touch events can be captured. In the capture phase, which precedes the bubbling phase, an event starts from the parent component to the child component.
Binding for event capturing covers the following:
Bind an event callback for event capturing: on:{event}.capture.
Bind an event callback, but stop the event from being captured during downward transfer: grab:{event}.capture.
Example
<!-- xxx.hml -->
<div>
  <!-- Bind an event callback for event capturing.5+ -->
  <div on:touchstart.capture="touchstartfunc"></div>
  <!-- Bind an event callback, but stop the event from being captured during downward transfer.5+ -->
  <div grab:touchstart.capture="touchstartfunc"></div>
</div>
  // xxx.js
  export default {
      touchstartfuc: function(e) {
          console.log(e);
      },
  }
Loop Rendering
<!-- xxx.hml -->
<div class="array-container" style="flex-direction: column;margin: 200px;">
  <!-- div loop rendering -->
  <!-- By default, $item indicates the element in the array, and $idx indicates the index of the element in the array. -->
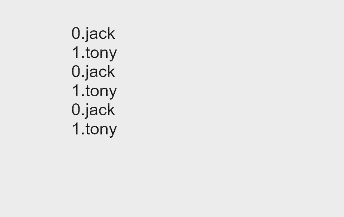
  <div for="{{array}}" tid="id" onclick="changeText">
    <text>{{$idx}}.{{$item.name}}</text>
  </div>
  <!-- Define the name for an element variable. -->
  <div for="{{value in array}}" tid="id" onclick="changeText">
    <text>{{$idx}}.{{value.name}}</text>
  </div>
  <!-- Define an element variable and its index name. -->
  <div for="{{(index, value) in array}}" tid="id" onclick="changeText">
    <text>{{index}}.{{value.name}}</text>
  </div>
</div>
// xxx.js
export default {
  data: {
    array: [
      {id: 1, name: 'jack', age: 18},
      {id: 2, name: 'tony', age: 18},
    ],
  },
  changeText: function() {
    if (this.array[1].name === "tony"){
      this.array.splice(1, 1, {id:2, name: 'Isabella', age: 18});
    } else {
      this.array.splice(2, 1, {id:3, name: 'Bary', age: 18});
    }
  },
}
The tid attribute accelerates the for loop and improves the re-rendering efficiency when data in a loop changes. It specifies the unique ID of each element in the array. If it is not specified, the index of each element in the array is used as the ID. For example, tid=“id” indicates that the id attribute of each element is its unique ID. The for loop supports the following statements:
for=“array”: array is an array object, whose element variable is $item by default.
for=“v in array”: v is a custom element variable, whose index is $idx by default.
for=“(i, v) in array”: i indicates the element index, and v indicates the element variable. All elements of the array object will be looped through.
NOTE - Each element in the array must have the data attribute specified by tid. Otherwise, an exception may occur.
The attribute specified by tid in the array must be unique. Otherwise, performance loss occurs. In the above example, only id and name can be used as tid because they are unique fields.
The tid attribute does not support expressions.

Conditional Rendering
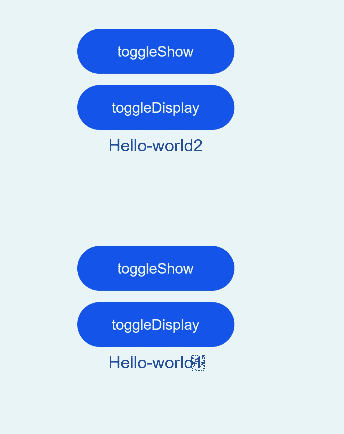
There are two ways to implement conditional rendering: if-elif-else or show. In if-elif-else, when the if statement evaluates to false, the component is not built in the VDOM and is not rendered. For show, when show is false, the component is not rendered but is built in the VDOM. In addition, the if-elif-else statements must be used in sibling nodes. Otherwise, the compilation fails. The following example uses both ways to implement conditional rendering:
<!-- xxx.hml -->
<div class="container">
  <button class="btn" type="capsule" value="toggleShow" onclick="toggleShow"></button>
  <button class="btn" type="capsule" value="toggleDisplay" onclick="toggleDisplay"></button>
  <text if="{{visible}}"> Hello-world1 </text>
  <text elif="{{display}}"> Hello-world2 </text>
  <text else> Hello-World </text>
</div>
/* xxx.css */
.container{
  flex-direction: column;
  align-items: center;
}
.btn{
  width: 280px;
  font-size: 26px;
  margin: 10px 0;
}
// xxx.js
export default {
  data: {
    visible: false,
    display: true,
  },
  toggleShow: function() {
    this.visible = !this.visible;
  },
  toggleDisplay: function() {
    this.display = !this.display;
  }
}

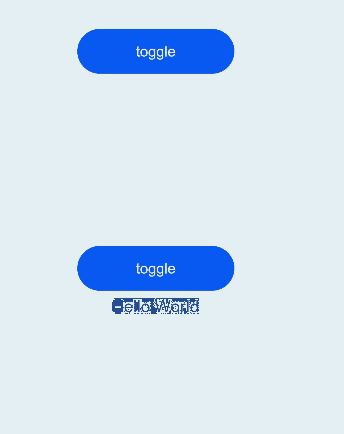
In the optimized rendering (show), if show is true, the node is rendered properly; if it is false, the display style will be none.
<!-- xxx.hml -->
<div class="container">
  <button class="btn" type="capsule" value="toggle" onclick="toggle"></button>
  <text show="{{visible}}" > Hello World </text>
</div>
/* xxx.css */
.container{
  flex-direction: column;
  align-items: center;
}
.btn{
  width: 280px;
  font-size: 26px;
  margin: 10px 0;
}
// xxx.js
export default {
  data: {
    visible: false,
  },
  toggle: function() {
    this.visible = !this.visible;
  },
}
NOTE
Do not use for and if attributes at the same time in an element.

Logic Control Block
<block> makes loop rendering and conditional rendering more flexible. A <block> will not be compiled as a real component. Note that the <block> tag supports only the for and if attributes.
<!-- xxx.hml -->
<list>
  <block for="glasses">
    <list-item type="glasses">
      <text>{{$item.name}}</text>
    </list-item>
    <block for="$item.kinds">
      <list-item type="kind">
        <text>{{$item.color}}</text>
      </list-item>
    </block>
  </block>
</list>
// xxx.js
export default {
  data: {
    glasses: [
      {name:'sunglasses', kinds:[{name:'XXX',color:'XXX'},{name:'XXX',color:'XXX'}]},
      {name:'nearsightedness mirror', kinds:[{name:'XXX',color:'XXX'}]},
    ],
  },
}

Template Reference
HML supports using element to reference template files. For details, see Basic Usage of Custom Components.
<!-- template.hml -->
<div class="item">
  <text>Name: {{name}}</text>
  <text>Age: {{age}}</text>
</div>
<!-- index.hml -->
<element name='comp' src='../../common/template.hml'></element>
<div>
  <comp name="Tony" age="18"></comp>
</div>
你可能感兴趣的鸿蒙文章
harmony 鸿蒙Atomic Service Full Screen Launch Component (FullScreenLaunchComponent)
harmony 鸿蒙Arc Button (ArcButton)
harmony 鸿蒙Frame Animation (ohos.animator)
harmony 鸿蒙Implementing Property Animation
- 所属分类: 后端技术
- 本文标签: